Quick Start
-
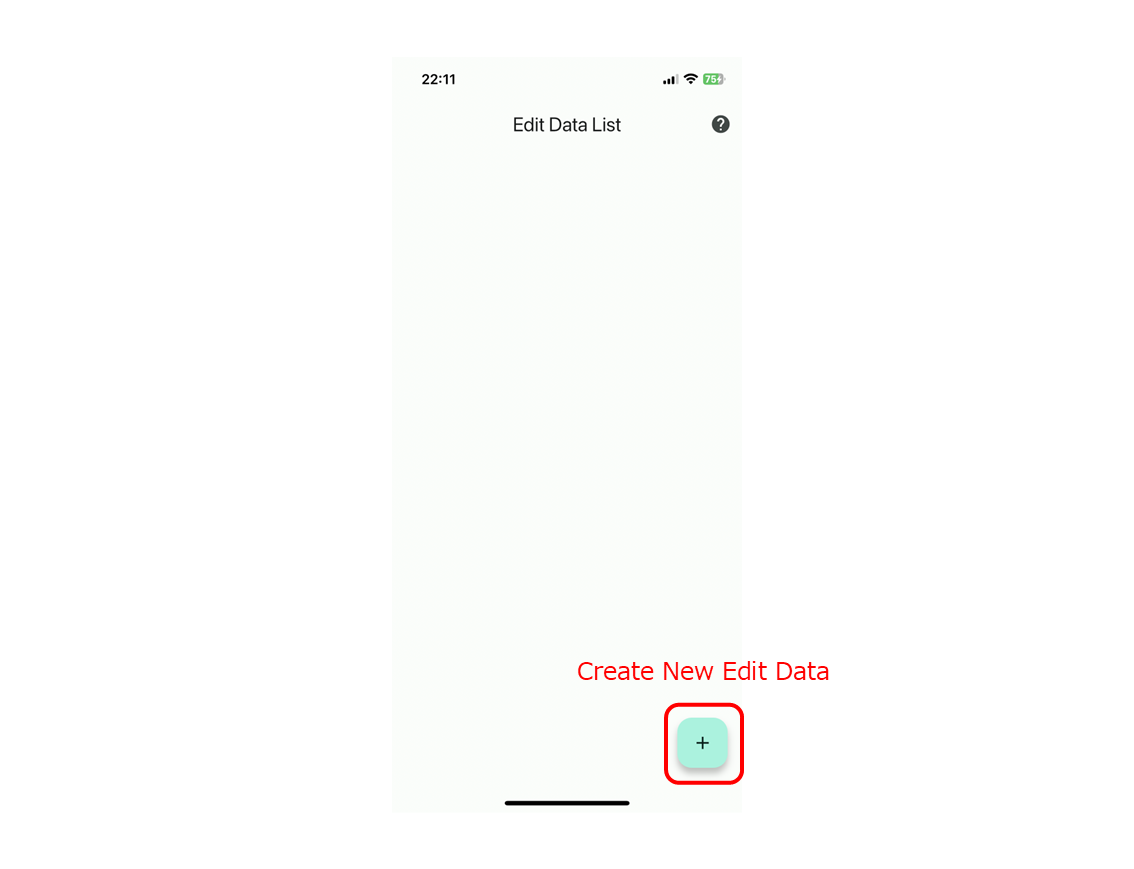
Create New Edit Data
You can create new edit data by pressing the plus button at the bottom right of the screen. Please enter a name for your new edit data.
-
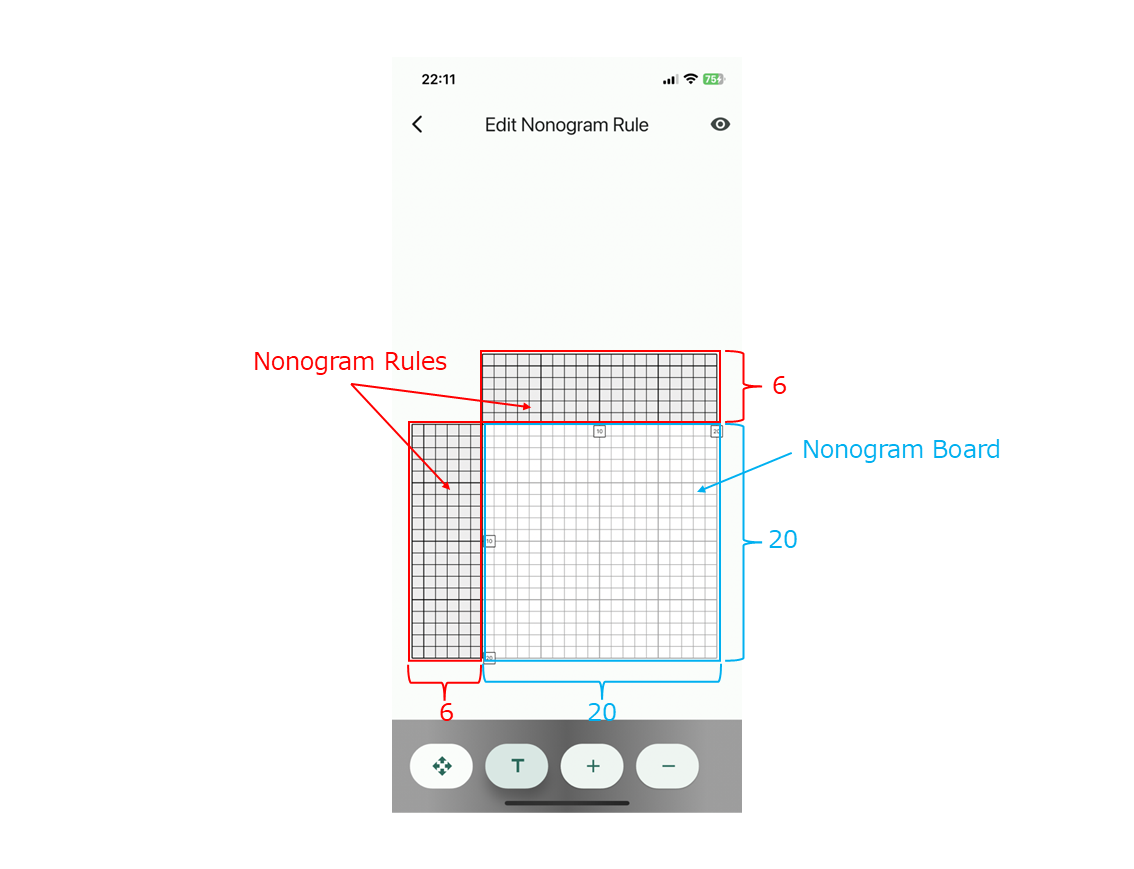
Check the Nonogram Board
In the edit nonogram rule screen, you can zoom in, zoom out, and move up, down, left, and right. By default, a 20x20 nonogram board and 6 lengths nonogram rules are created. Move to a position where you can check the nonogram board.
-
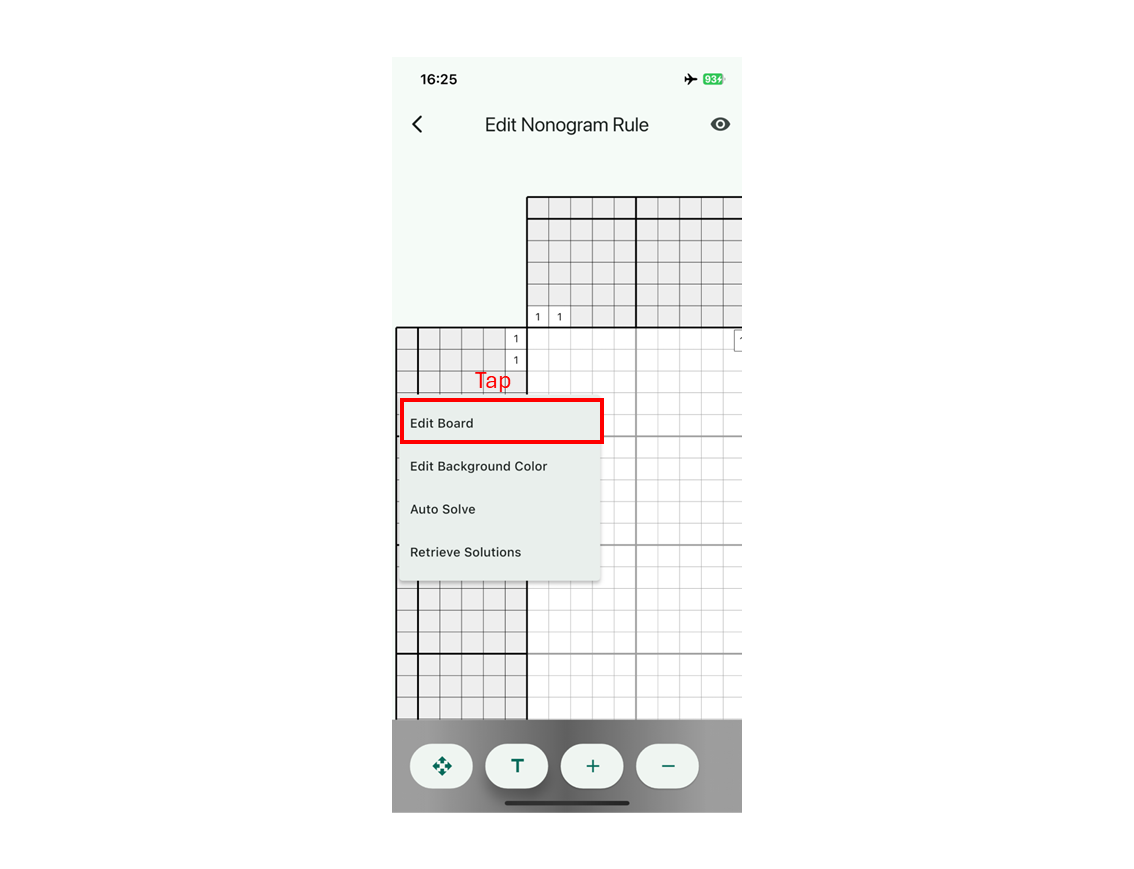
Move to Nonogram Board Editing
First, specify the size of the nonogram board and any unnecessary cells in the case of deformed nonogram. Long-press the nonogram board and select "Edit Board" from the menu. Note that editing the board will delete all your input, so make sure to do this first.
-
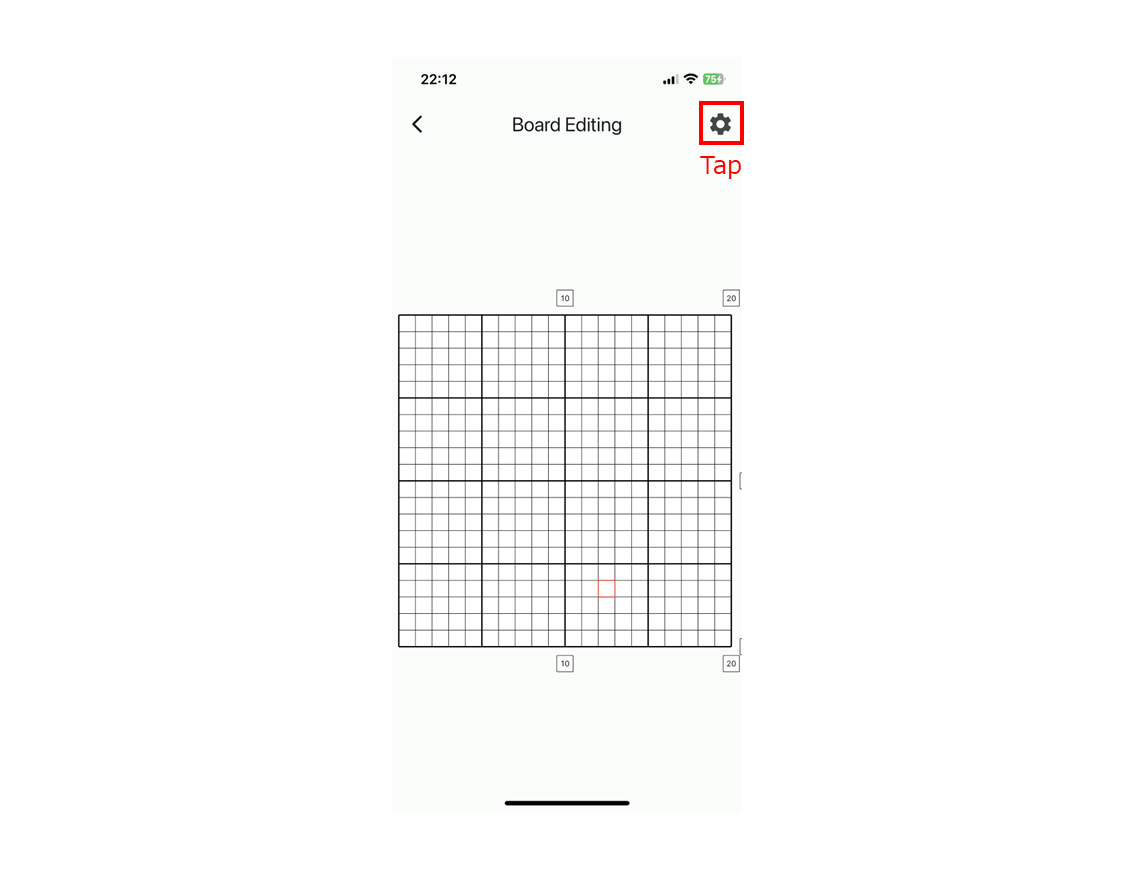
Change Nonogram Board Size
Tap the gear icon at the top right of the screen. From the displayed menu, select "Change Board Size" and enter the board size you want to solve automatically. Currently, sizes from 2 to 500 cells in both width and height are supported. Please note that any values outside this range will be ignored.
-
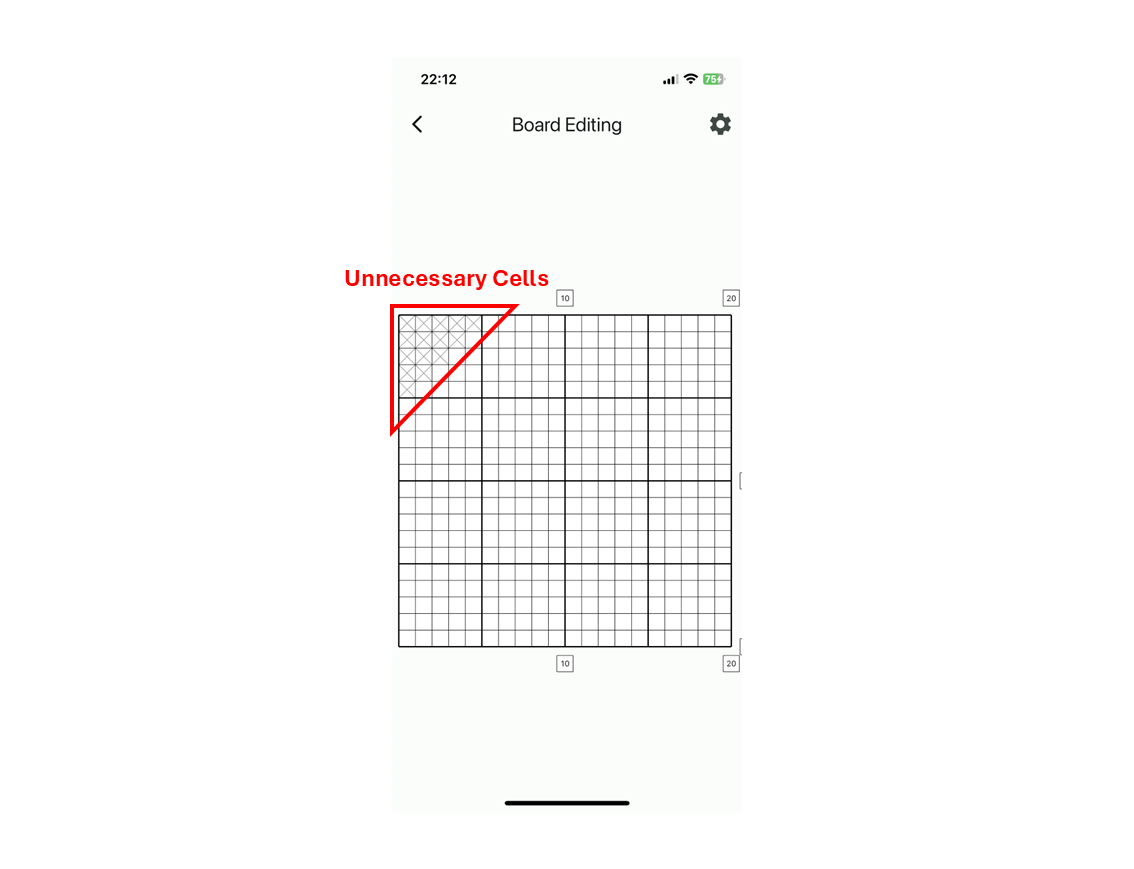
Selecting Unnecessary Cells (for Deformed Nonogram)
In deformed nonogram, board shapes are not limited to rectangles. In the board editing screen, you can select whether a cell is necessary or unnecessary by tapping the cells on the nonogram board. Unnecessary cells are represented with a gray cross. Tapping a necessary cell will change it to an unnecessary cell, and tapping an unnecessary cell will change it to a necessary cell.
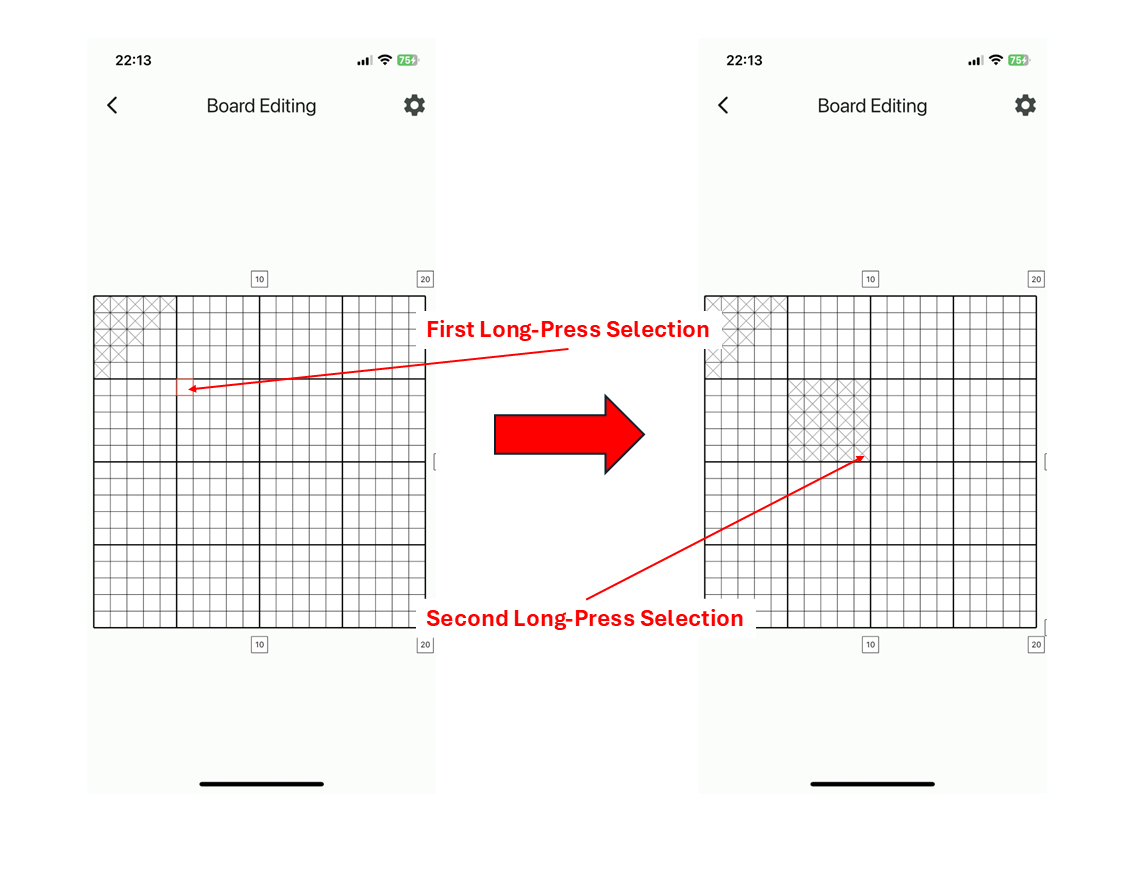
You can also change a rectangular area of any size all at once. By long-pressing on the nonogram board, a red selection frame will appear. In this state, long-press another spot on the nonogram board to change the rectangular area defined by these two points as diagonals. Whether the rectangular area is filled with necessary or unnecessary cells depends on whether the initially long-pressed cell is necessary or unnecessary. Once you have finished making changes, press the back button at the top left to return to the rule editing screen.
-
Hide, and Change the Order of Rules (for Deformed Nonogram)
In the case of deformed nonogram, the rules tend to overlap with each other.
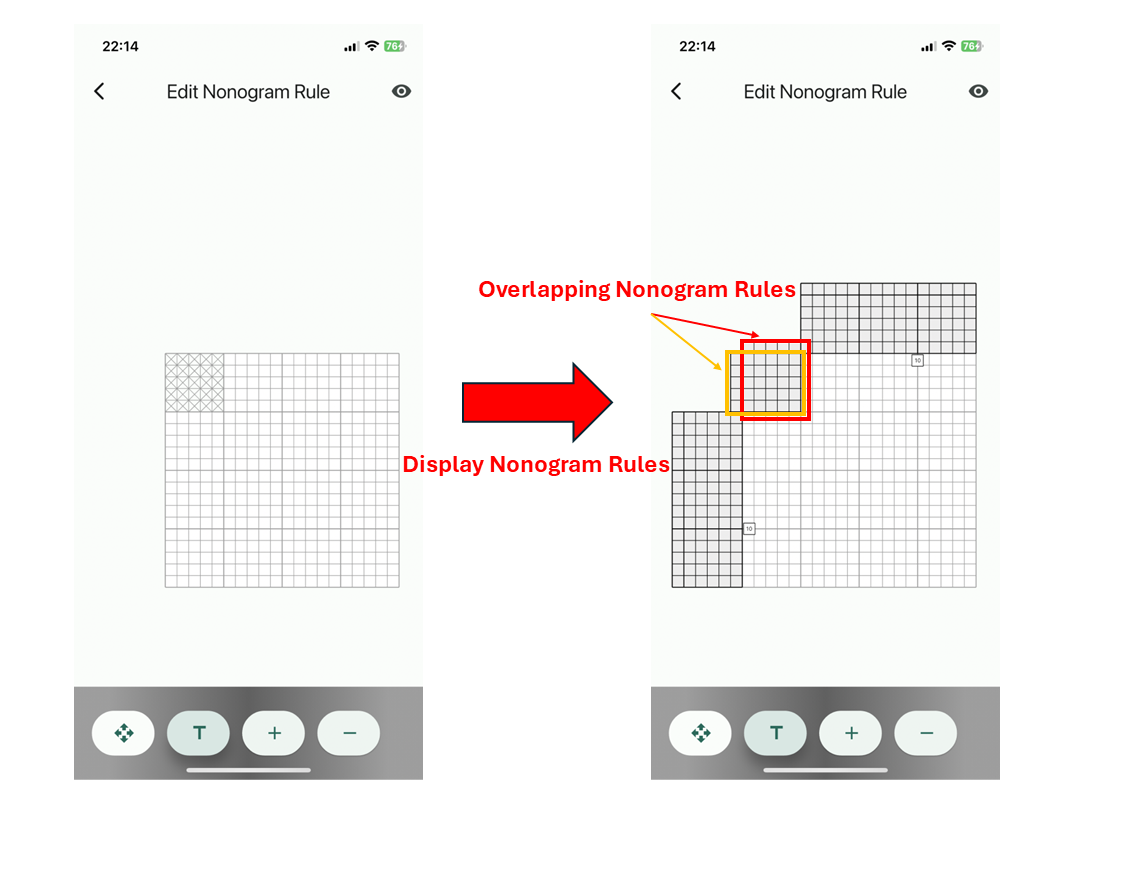
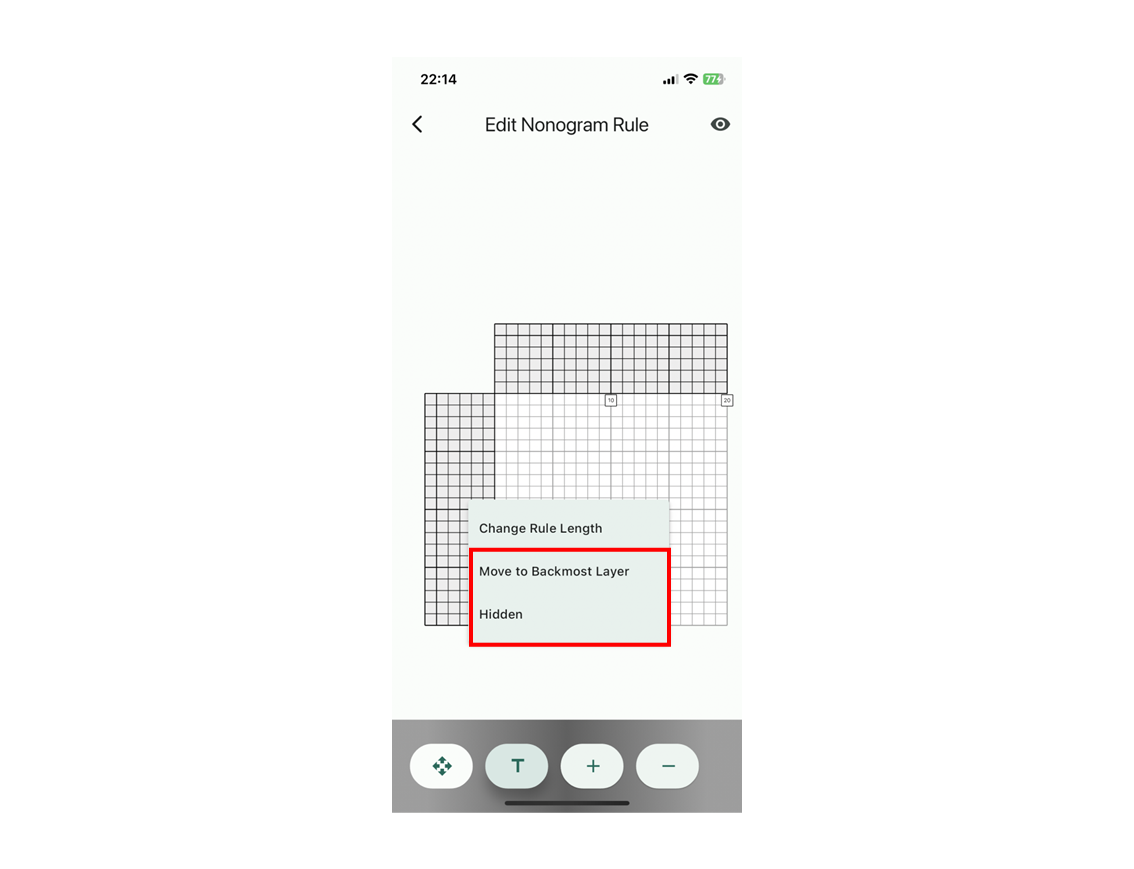
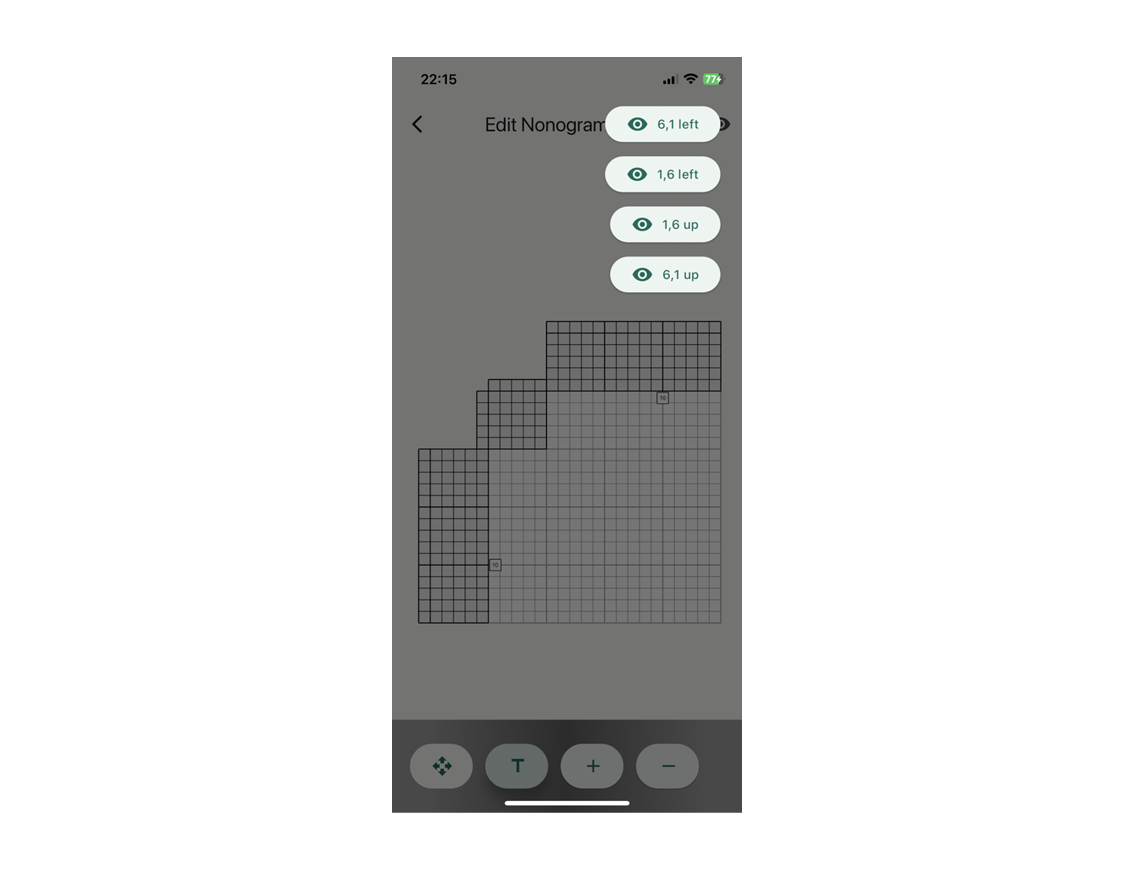
Therefore, a rule hiding is capable. By long-pressing on a nonogram rule, a menu will appear with options to hide the rule or move it to the back. You can use these options to hide rules or change their display order.
Additionally, by clicking the eye icon at the top right, you can display a list of rules and control their visibility. By hiding all rules except the one you are editing, you can input rules at any desired position.
-
Change the Length of the Rules
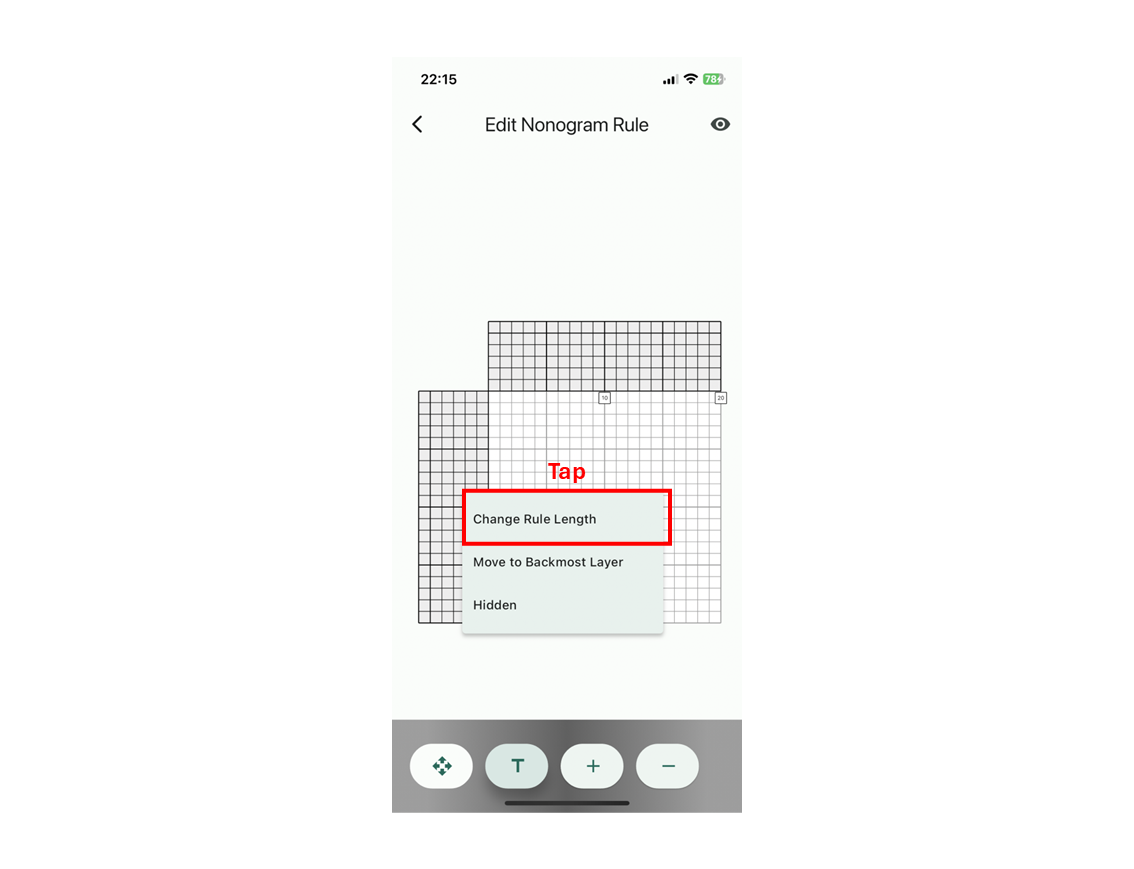
You can change the length of the rules to any desired length. By long-pressing on a nonogram rule, a menu will appear with the option "Change Rule Length." A length change dialog will then appear. Currently, you can set the rule length from 3 to 250. Please note that any values outside this range will be ignored.
-
Enter the Nonogram Rules
Tap the text mode button at the bottom of the screen. This will allow you to input the nonogram rules. Tap the cell you want to change, and a red (for the left side of the board) or orange (for the top side of the board) selection frame will appear. In this state, you can enter the numbers.
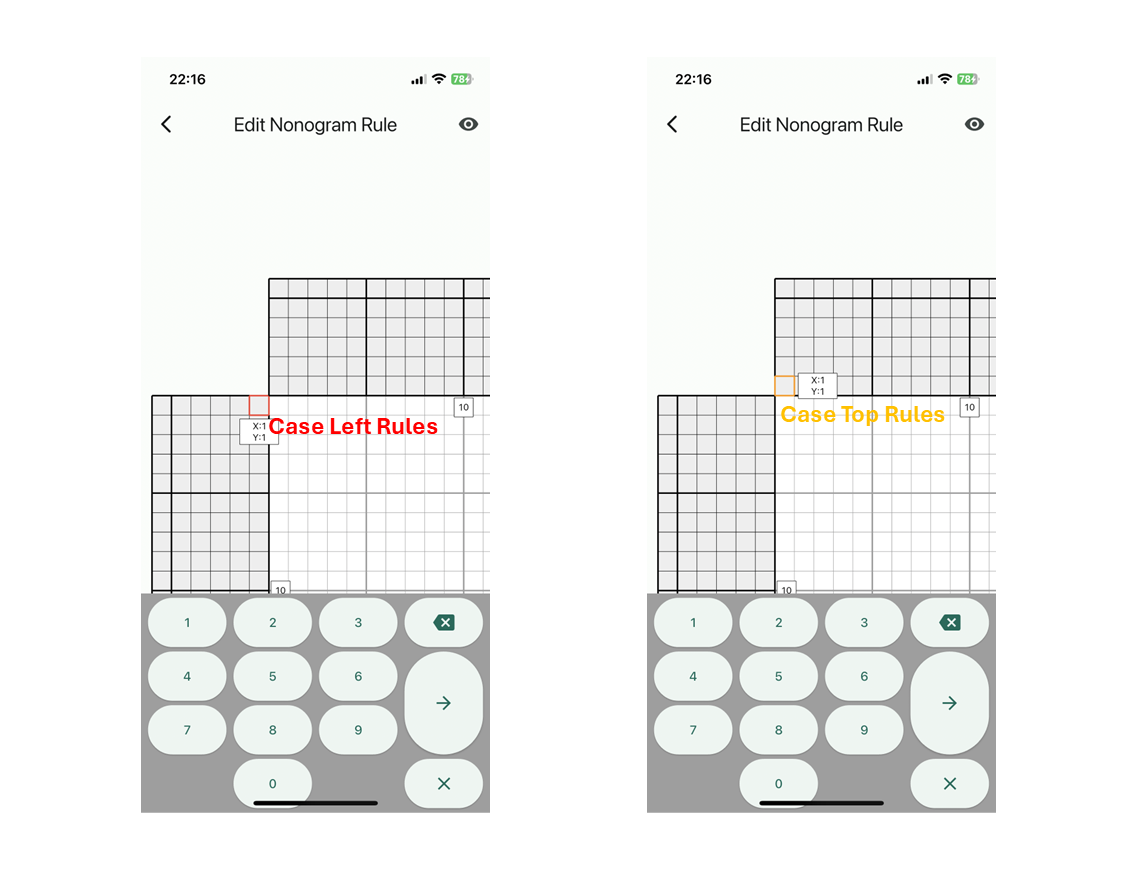
Once you have finished entering a number, you can move to the next cell by pressing the right arrow button. If you press the right arrow button in an empty cell, you will move to the next row. Similarly, you can use the delete button to move back to the previous cell by pressing it in an empty cell. If you are at the edge of a row, it will move to the previous row. When you have finished entering all the numbers, you can close the keyboard by pressing the cross button on the keyboard.
-
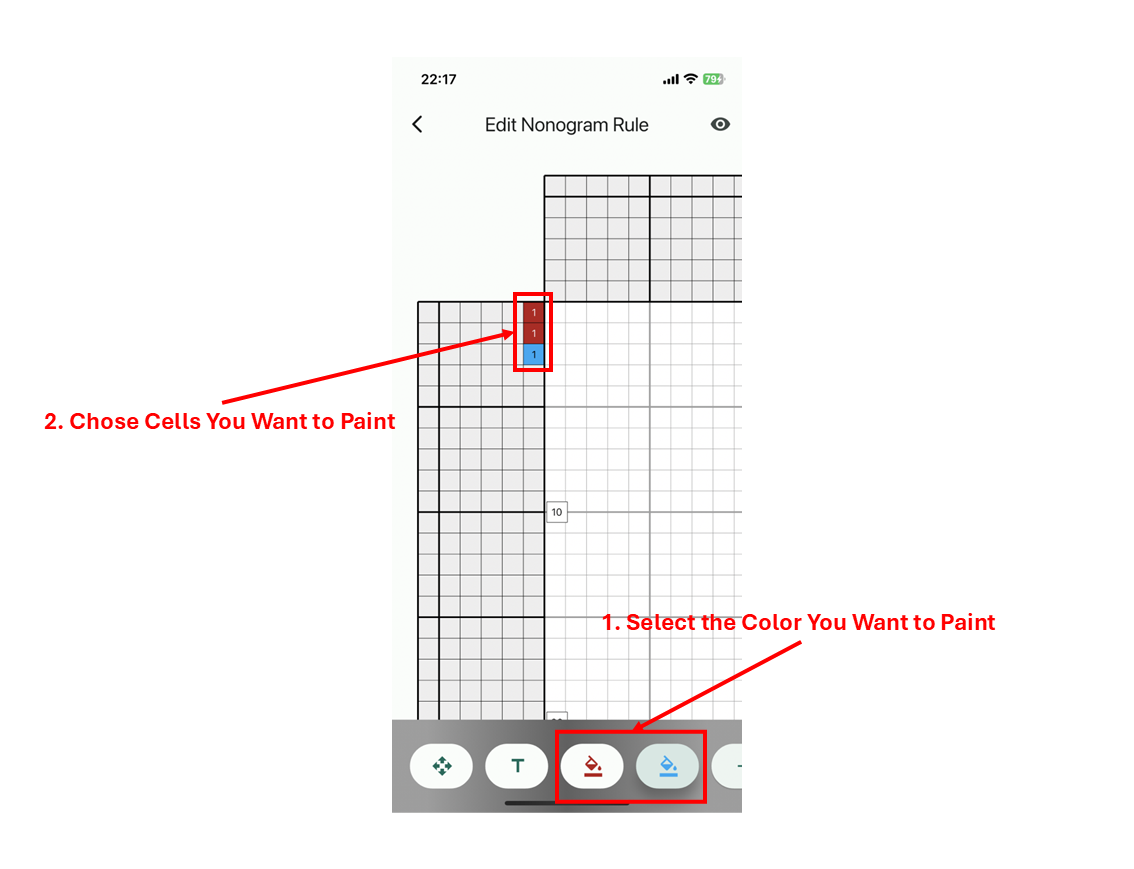
Enter the Rule Colors(for Color Nonogram)
By pressing the plus button at the bottom of the screen, you can add a color. The minus button is used to delete a color. Since all cells with numbers will be initialized with the first added color, adding the most frequently used color in the puzzle first can reduce the effort required for color input. Additionally, you can edit an already added color by long-pressing its button.
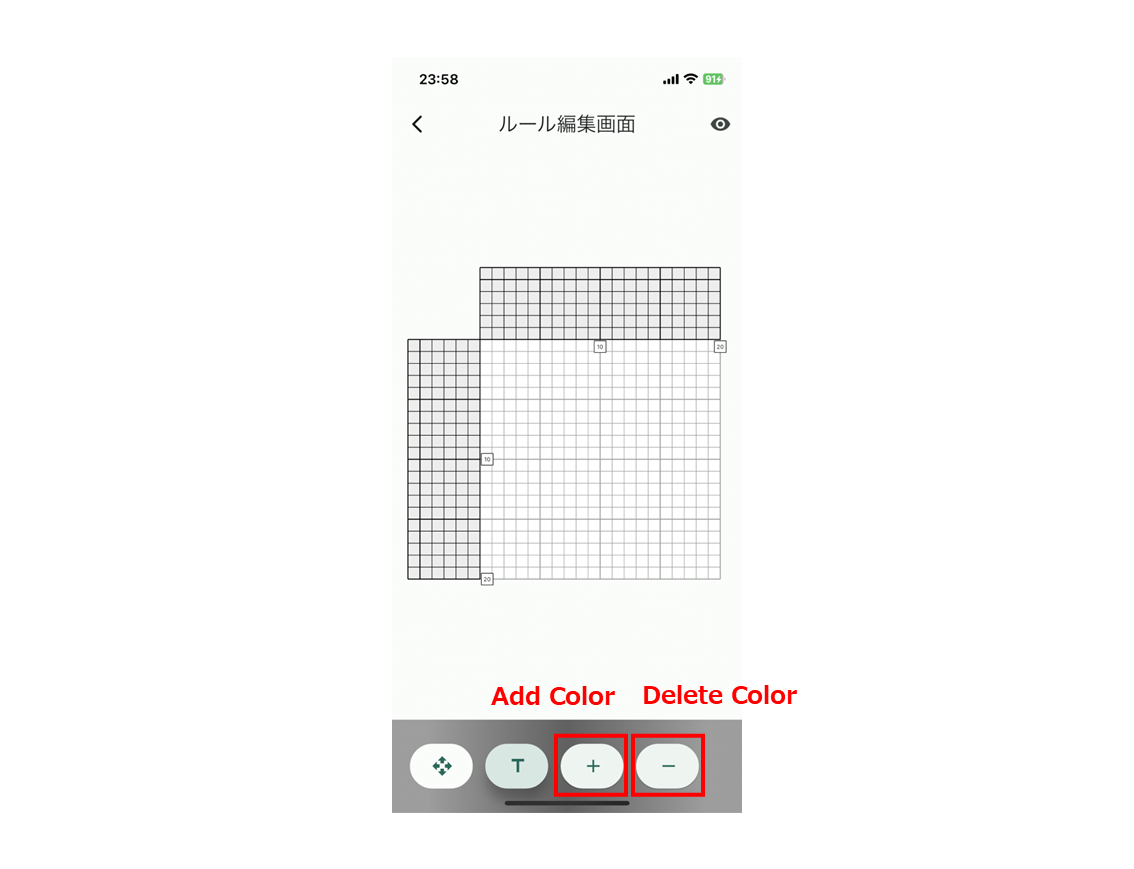
Once you have finished adding colors, you can input colors into the rules by tapping on the desired color. After selecting the color you want to use, tap on the cell to change the color.
-
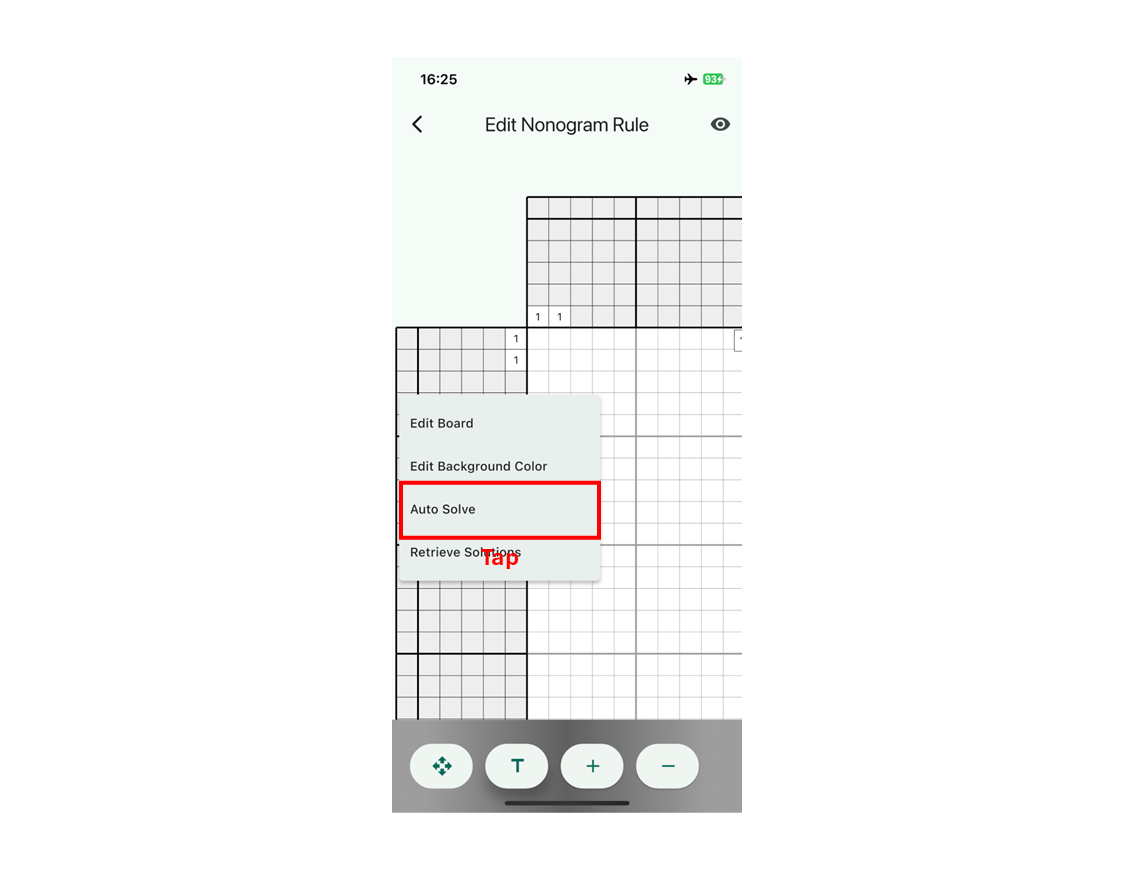
Execute Auto-Solve
In a Nonogram, you can perform an automatic solution by long-pressing the board and tapping the "Auto-Solve" option from the menu that appears. Before executing the automatic solution, the app performs a simple check to ensure that the sum of the numbers in the left and top hints for each color matches. If there are no issues, a description of the auto-solve plan will be displayed.
-
Select Auto-Solve Plan
Nonograver offers both a free plan and a paid plan for the auto-solve feature. With the free plan, you can obtain a solution by watching an advertisement. However, the memory size and server execution time are limited. As a result, for larger puzzles, you may not be able to obtain a solution. In such cases, please consider selecting the paid plan, which allows solving larger Nonograms.
-
Get Solution (Free Plan)
If a solution is obtained, it will be displayed directly on the Nonogram board.
-
Get Solution (Paid Plan)
Once the payment is complete, you may close the app. When the solution is ready, you will receive a notification from the app (only if notifications are allowed). When you receive the completion notification, long-press the Nonogram board to open the menu and tap "Retrieve Solutions" to obtain the solutions.
For the paid version, the solutions are stored on the server for 30 days only. Therefore, if the solutions is accidentally deleted, you can retrieve it again by tapping "Retrieve Solutions". However, if you make changes that affect the integrity of the puzzle, such as editing the board or changing the number of colors, you may no longer be able to retrieve the solutions. Please proceed with caution.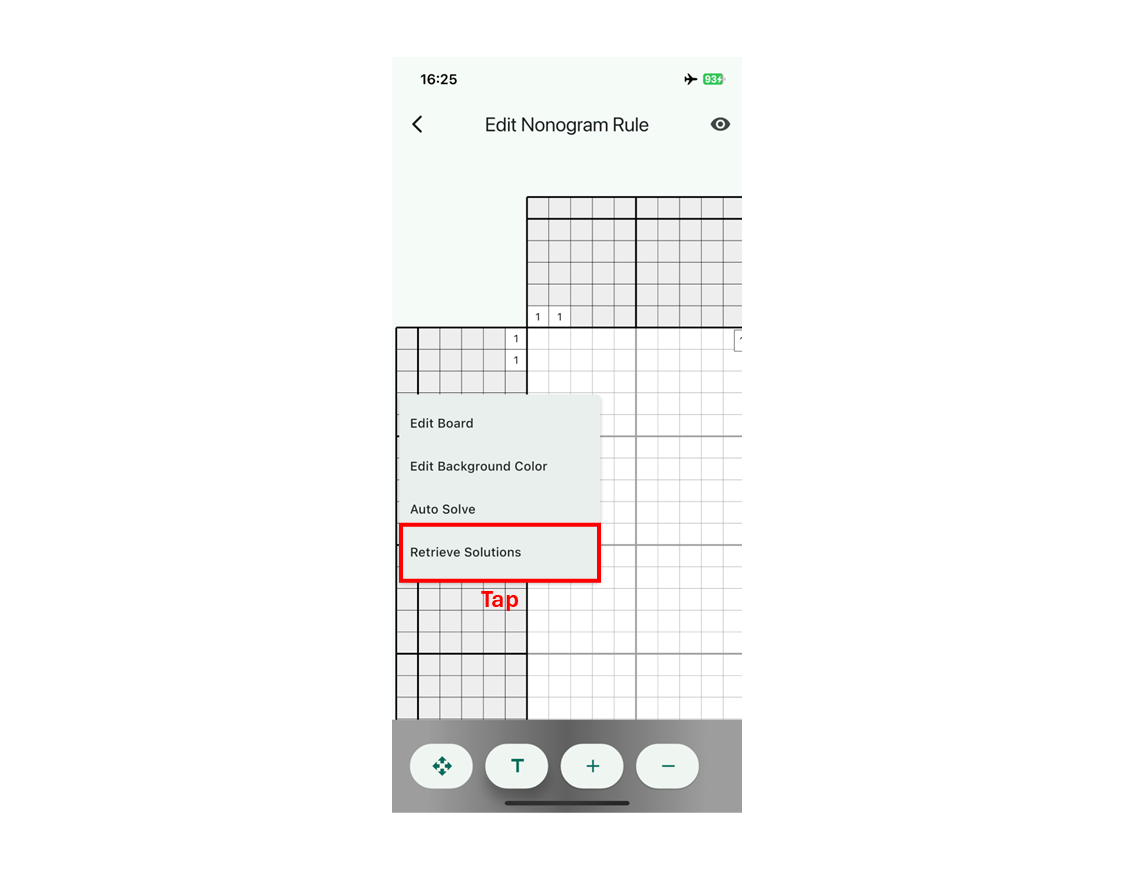
-
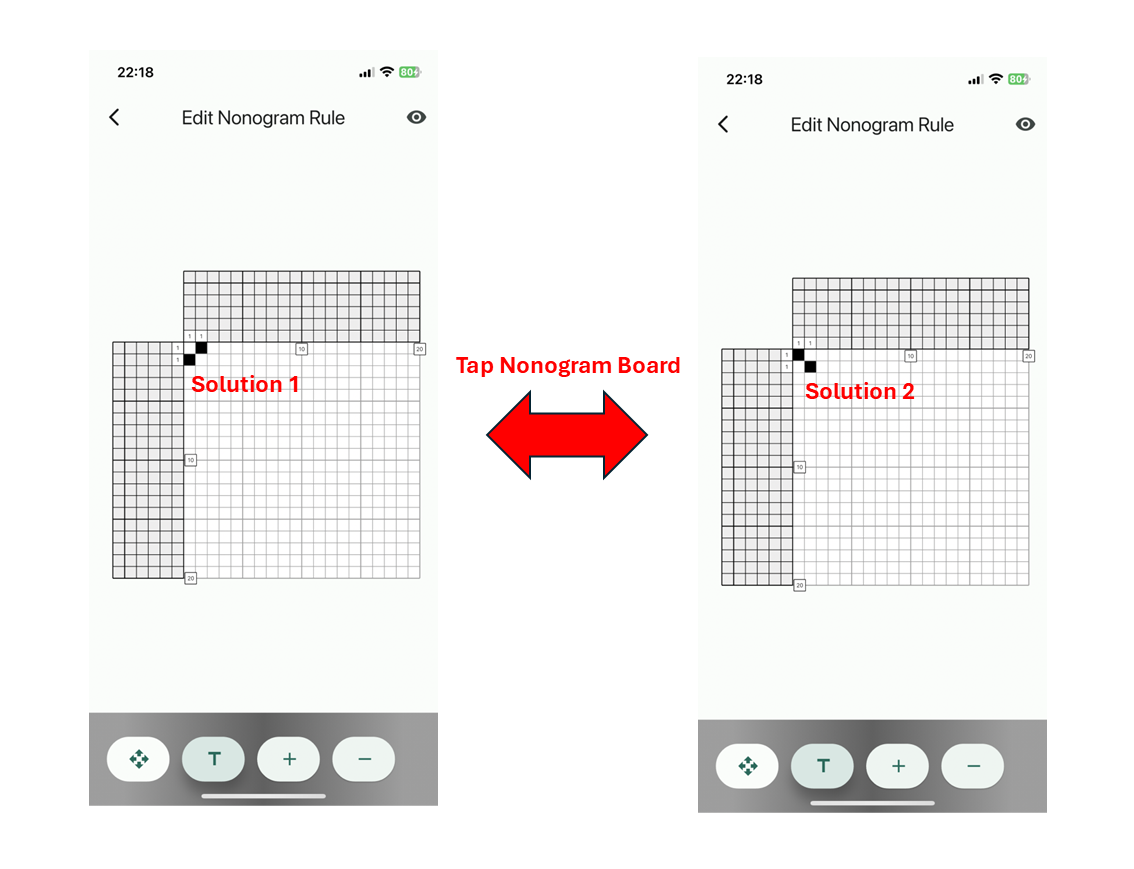
Check the Solution
If multiple solutions are found, you can proceed to the next solution by tapping the nonogram board.
Supplementary Explanation
-
About Deleting Solutions
If you edit the nonogram, such as modifying the board, changing the rule numbers or colors, adding colors, or deleting colors, the obtained solution will be deleted. However, editing only the existing colors will not trigger solution deletion. You can use this feature, for example, when changing colors to different colors.
-
About Move Mode
To prevent accidental edits to the rules, a Move Mode is provided. If you only want to navigate the nonogram board without making changes, please use Move Mode.
-
About Background Color Change
You can change the background color by long-pressing the Nonogram board and selecting "Edit Background Color" from the menu. This feature is useful when solving nonograms with a black background and white squares using the auto-solve function.